Vitamix Vanilla Ice Cream Recipe
My blender used to sit in the kitchen making smoothies and sometimes soup. Last Sunday, my sister-in-law brought homemade vanilla ice cream from her ice cream maker, which got me curious about what my blender could do.
I decided to make my own Vitamix Vanilla Ice Cream Recipe on Tuesday night after the kids went to bed. My first attempt taught me about timing, so I tried again a few days later, changing how long I let everything freeze first.
By my fourth attempt, my husband Andrew was waiting by the freezer for a taste. I appreciate how little cleanup this recipe requires, especially compared to a machine that needs a bowl to freeze for a full day.
Now, I can make this ice cream on hot afternoons without any planning, and I have been successful.
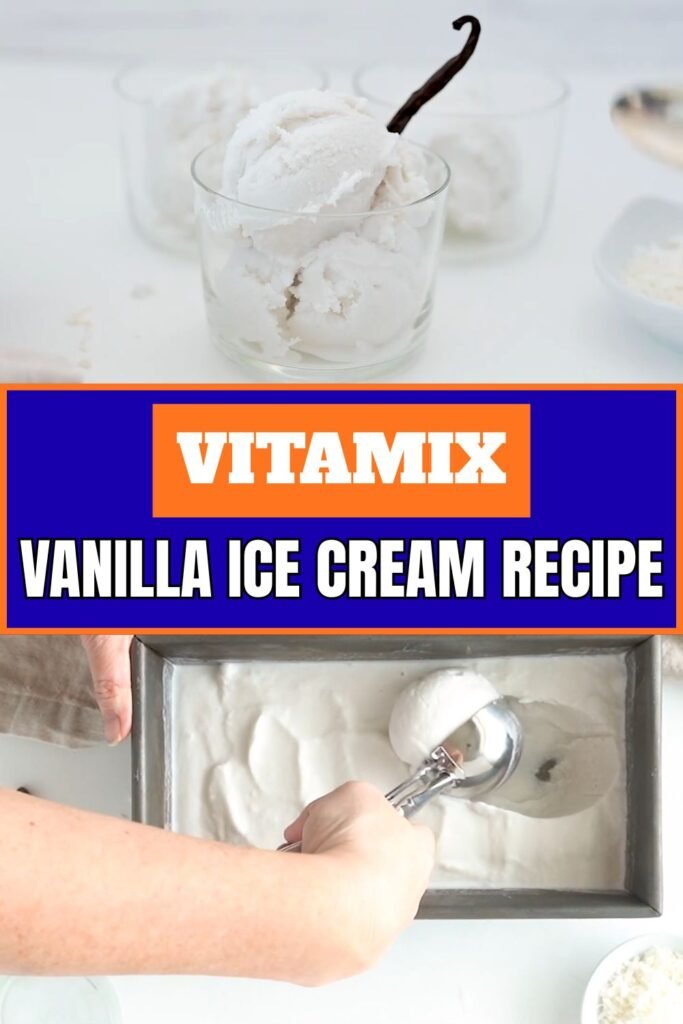
What Makes This Vitamix Vanilla Ice Cream So Different?
Vitamix Vanilla Ice Cream does not use a paddle or rock salt like traditional ice cream makers. Instead, it uses a blender’s speed and friction.
A high-speed blender can turn frozen cream cubes into small ice crystals in under a minute. In contrast, a churn takes twenty to thirty minutes to do the same job.
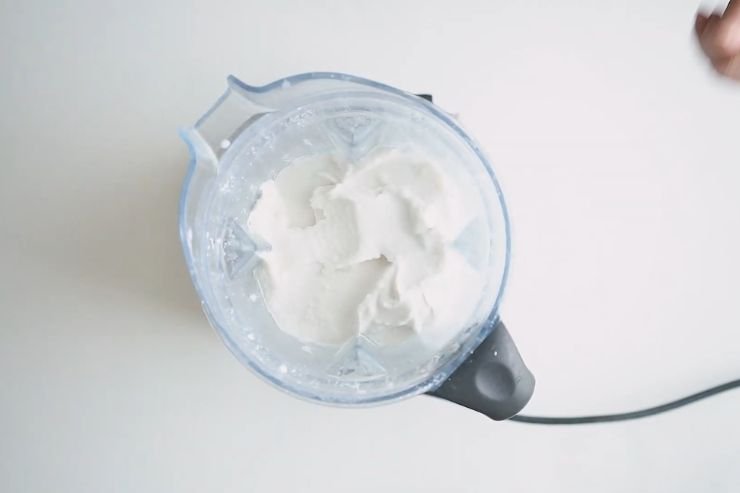
Right after blending, the ice cream has a texture like a milkshake or soft serve. If you put it in the freezer for a while, it will become scoopable ice cream. You do not need a separate ice cream machine to make this.
The fat in the cream coats the ice crystals as they form, stopping them from clumping together. This process makes the ice cream creamy rather than icy. Anyone with a blender that can crush ice can make this at home.
Why I Keep Coming Back to This Easy Homemade Ice Cream
This recipe takes about eight minutes to make, from freezer to bowl. This is perfect for nights when dessert is an afterthought. You won’t need an ice cream machine, rock salt, or to wait a full day for freezing.
The vanilla flavor is strong because you add it last, right before the mixture thickens. This way, the extract keeps its flavor better than in a stovetop custard.
My kids prefer this dessert to store-bought ice cream because they can choose their own mix-ins once it’s in the bowl. Anyone who can use a blender can make it from start to finish.
It’s also great for parties: blend, scoop, and serve in twenty minutes, as long as you have cream cubes ready.
Which Vitamix Blender and Container Work Best?
I usually make this in a Vitamix A3500, but an older 5200 works well for frozen cream cubes too. Both blenders have similar power. The 64-ounce container is best for this recipe. If you use a smaller 32- or 48-ounce container, you will need to stop and scrape it more often.
The tamper is needed because frozen cubes create an air pocket above the blades. The tamper pushes the cubes down while the blender runs, keeping everything moving and preventing the motor from stalling.
If you don’t use the tamper, you may have to stop the blender multiple times to push the cubes down with a spatula, which can heat the motor.
Compared to a Ninja blender, the Vitamix motor has steadier power and handles cubes with fewer stalls. A dedicated ice cream maker makes smoother ice cream, but this method makes dessert in minutes, not hours.
Ingredients for Vitamix Vanilla Ice Cream
2 cups heavy whipping cream, frozen into cubes: This is the fat that turns crushed ice into real ice cream, not a snow cone. I reach for Organic Valley, since the fat content stays consistent carton to carton. Freeze it in a tray a full 8 hours so the cubes come out solid.
1 cup whole milk, chilled: The milk thins the mixture just enough to keep the blades from choking on solid fat. Straus Family Creamery works well here, since it adds a little extra richness. Keep it cold; room-temperature milk melts the cubes faster than the blades can crush them.
⅔ cup granulated sugar: Sugar sweetens the base and lowers its freezing point, keeping the ice cream from turning into a solid brick. C&H dissolves fast enough that I’ve never ended up with a grainy result. Level the cup with a knife rather than scooping straight from the bag.
1 tablespoon pure vanilla extract: Most of the flavor in this recipe comes from this one bottle. Nielsen-Massey Madagascar Bourbon is what I keep next to my mixer year-round. Add it near the end of blending, since the aroma fades under the motor’s heat.
⅛ teaspoon fine sea salt: A small pinch rounds out the sweetness without making the ice cream taste salty. I use Diamond Crystal, since the fine crystals dissolve completely in a short blend. Coarse salt won’t break down in time.
1 tablespoon light corn syrup (optional): This keeps the ice cream scoopable after time in the freezer, since it interferes with ice crystal formation more than sugar alone. Karo is the version I keep just for this. Leave it out for a softer result meant to be eaten right away.
Kitchen Tools You’ll Need
- Vitamix blender: crushes frozen cubes fast
- Ice cube trays: freeze cream in advance
- Tamper: pushes cubes into blades
- Rubber spatula: scrapes down container sides
- Freezer-safe container: stores extra ice cream
- Measuring cups and spoons: keeps ratios accurate
How I Make Vanilla Ice Cream in a Vitamix
1. Freeze the Cream Cubes: Pour the heavy cream into a standard ice cube tray the night before. Freeze it at least 8 hours, until each cube feels solid with no soft center. Half-frozen cubes are the fastest way to end up with a thin, soupy mixture.
2. Add the Base Ingredients: Add the frozen cream cubes, chilled milk, sugar, and salt to the Vitamix container first. Save the vanilla for later; blending it in too early mellows its scent under the motor’s heat. Twist the lid on tight and set the tamper into its port.
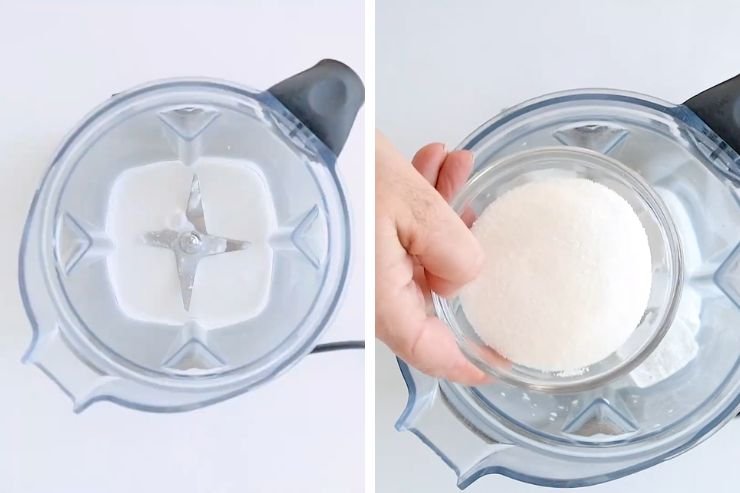
3. Start Blending on Low: Run the blender on its lowest speed for about 6 seconds to break the cubes into smaller pieces. You’ll hear a rough, clattering sound as they bounce around. That settling into a steady hum means it’s time to increase speed.
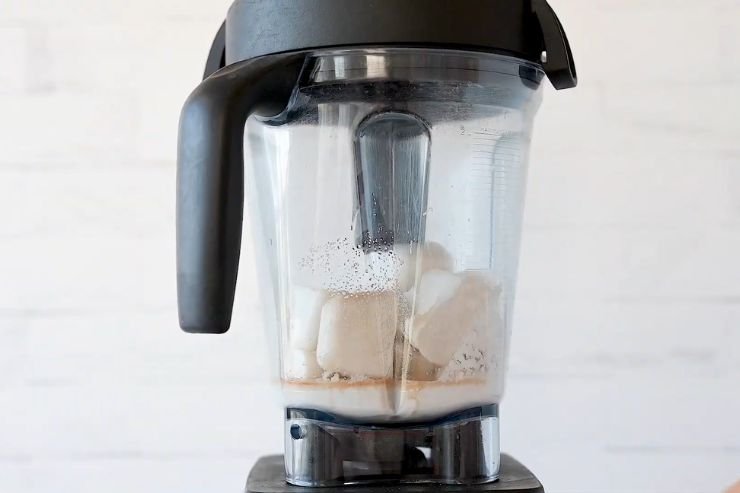
4. Increase Speed and Use the Tamper: Move the dial to medium-high, then push the tamper down through the center port in short, steady strokes to guide the cubes into the blades. The motor may bog down and sound strained; keep tamping steadily instead of pausing, since stopping lets the cubes re-freeze against the sides.
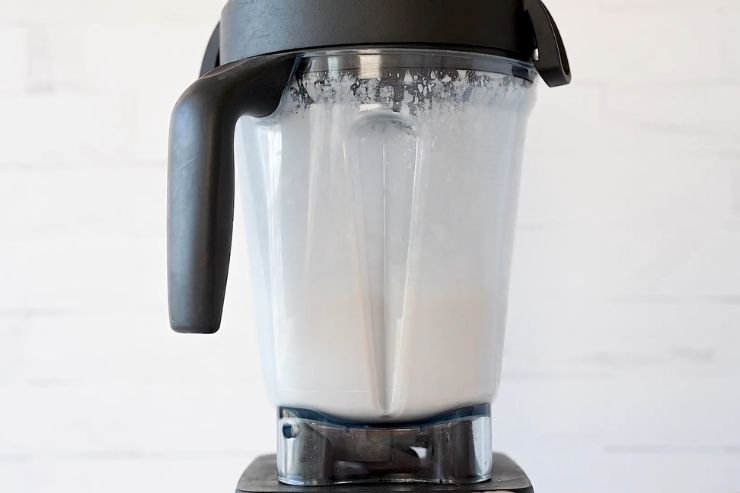
5. Blend Until Thick and Creamy: Once the mixture stops clattering and starts to mound around the tamper, add the vanilla and blend another 10 to 15 seconds. The finished texture should look like soft serve, thick enough to hold a swirl when the tamper lifts out.
Overblending past this point melts it back into something closer to a milkshake, and the only fix is refreezing the batch into cubes and starting over.
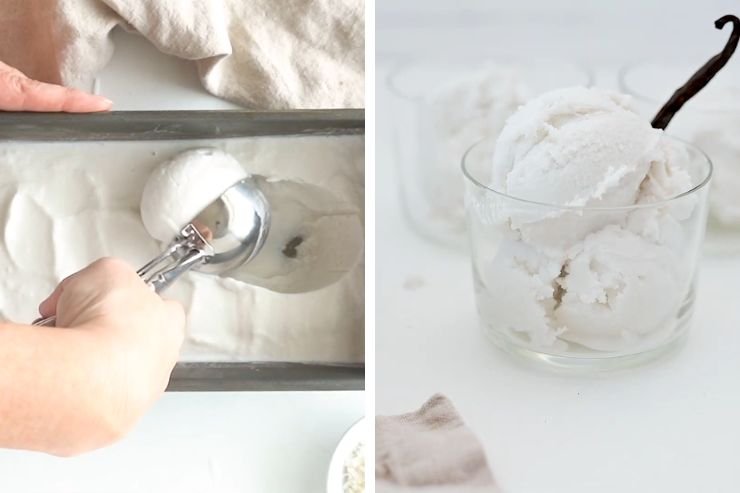
6. Serve or Freeze to Firm Up: Scoop straight from the blender for a soft-serve texture, or move it to a freezer-safe container for 40 minutes to 2 hours for something closer to scoopable ice cream.
Press parchment onto the surface before sealing the lid to cut down on ice crystals.
Common Problems I’ve Run Into and How to Fix Them
Too thick to blend: Cream cubes packed tightly sometimes clump into one block. Break them apart with a butter knife first.
Grainy texture: The sugar didn’t fully dissolve before the mixture thickened. Blend on low a few extra seconds after adding sugar.
Turns rock hard in the freezer: Skipping the corn syrup is the most common cause. Leave the container out 8 to 10 minutes before scooping.
Melts too quickly once scooped: Overblending adds too much air, weakening the structure at room temperature. Stop the moment it mounds.
Blender overheating mid-batch: Running a small motor more than 90 seconds on frozen cubes can trigger this. Let it rest a minute between stages.
My Best Tips for Extra-Creamy Blender Ice Cream
- Keep cube size uniform: Use one tray with same-sized wells so cubes crush at the same rate. Mismatched sizes mean some pieces turn to slush while others stay chunky.
- Get the cream-to-milk ratio right: Too much milk against too little cream thins the base before it thickens. Stick close to the ratio used here.
- Stop the moment it mounds: The texture changes fast in the last 10 seconds. Watch for the mixture piling up around the tamper rather than spinning flat.
- Freeze your serving bowls: A room-temperature bowl pulls heat out of the ice cream the second it’s scooped. Ten minutes in the freezer keeps servings firm longer.
- Don’t overfill the container: A packed container leaves no room for cubes to circulate, so the blades chew through the bottom layer while the top barely moves.
6 Easy Vanilla Ice Cream Variations You Should Try
French Vanilla: Blend in one egg yolk right before the mixture thickens for a richer, custard-like flavor. Pair it with warm apple pie on a cooler evening.
Vanilla Bean: Scrape the seeds from half a vanilla bean pod into the base instead of using extract alone. The black flecks look great scooped into a clear glass bowl for guests.
Chocolate Chip: Fold in a scant ⅓ cup mini chocolate chips once the mixture is thick enough to hold them. This one disappears fastest whenever my kids are around.
Caramel Swirl: Drizzle 3 tablespoons of caramel sauce through the batch with a butter knife, just enough to swirl without fully mixing it in. Serve alongside a warm brownie.
Birthday Cake: Stir in 2 tablespoons of rainbow sprinkles and a splash of almond extract at the end. This is the one I make every year for my daughter birthday.
Banana Vanilla: Add half a ripe, frozen banana to the blender with the cream cubes, and cut the sugar back by 2 tablespoons since the banana adds its own sweetness.
What to Serve With Homemade Vanilla Ice Cream
A simple scoop of ice cream is good on its own, but adding toppings makes it even better. Toasted pecans, fresh raspberries, or crushed shortbread cookies each add a nice texture against the smooth ice cream.
Warm chocolate sauce or thick caramel drizzle works well too, as the ice cream makes the sauce firm up instead of thinning it out.
You can enjoy a scoop with a warm brownie, a slice of peach cobbler, or a piece of chocolate cake. The mix of hot and cold creates a great experience.
You can also use this ice cream in milkshakes or sandwiched between two cookies. Pouring a shot of espresso over a scoop creates a quick affogato.
On weekends, I like to make a full dessert with warm brownies straight from the pan, a scoop of ice cream melting into them, and a drizzle of caramel sauce on top.
How I Store and Freeze Leftover Ice Cream
Use a shallow, wide container that is safe for the freezer. This helps the ice cream freeze evenly, so it doesn’t become hard on the outside while staying soft in the middle.
The ice cream will keep its texture for up to 5 days because the fat in the cream helps keep ice crystals small. Before sealing the lid, press parchment paper against the surface of the ice cream. This step helps prevent freezer burn more than just using the lid.
If the ice cream freezes too hard, leave the container on the counter for 8 to 10 minutes before scooping. Avoid using the microwave, as it melts the edges unevenly.
If you refreeze ice cream after it has completely melted, it will change the texture permanently because the fat and sugar structure does not reset.
For planning, freeze cream cubes in a sealed bag up to two weeks before serving. On serving day, all you need to do is blend them for a few minutes.
Vitamix Vanilla Ice Cream Recipe FAQs
1. How full should I fill the Vitamix container?
Fill the container about two-thirds full, including ice cubes and milk. When you pack it too tightly, the top layer won’t circulate to the blades. This can leave crushed ice at the bottom and whole cubes at the top.
2. How do I know when to stop blending?
Watch the mixture rather than the timer. When it stops splashing and forms a mound around the tamper, it’s done. This usually takes about 60 to 90 seconds.
3. What if the mixture turns into a milkshake instead of ice cream?
If it becomes too thin, you’ll have to freeze it again in a tray and blend it one more time.
4. My base is too thick to move. What should I do?
Add cold milk one tablespoon at a time, and pulse briefly after each addition. Adding too much liquid at once will make it too thin.
5. Can I make this dairy-free?
Yes, you can use full-fat canned coconut milk frozen into cubes and add a spoon of coconut cream for extra richness. Coconut fat works like dairy fat once it is frozen and crushed.
6. Is there a version for keto or low-sugar diets?
Use a granulated erythritol blend in the same amount as the sugar, and skip the corn syrup. Most sugar substitutes don’t freeze the same way so that the result will be a bit icier. Eat it within a day or two.
7. Is this naturally gluten-free?
Yes, every ingredient in the base recipe is gluten-free, including corn syrup. Just check any mix-ins like cookie pieces or cake crumbs to be sure.
Vitamix Vanilla Ice Cream Recipe
Ingredients
Method
- Pour the heavy cream into a standard ice cube tray the night before. Freeze it at least 8 hours, until each cube feels solid with no soft center. Half-frozen cubes are the fastest way to end up with a thin, soupy mixture.
- Add the frozen cream cubes, chilled milk, sugar, and salt to the Vitamix container first. Save the vanilla for later; blending it in too early mellows its scent under the motor’s heat. Twist the lid on tight and set the tamper into its port.
- Run the blender on its lowest speed for about 6 seconds to break the cubes into smaller pieces. You’ll hear a rough, clattering sound as they bounce around. That settling into a steady hum means it’s time to increase speed.
- Move the dial to medium-high, then push the tamper down through the center port in short, steady strokes to guide the cubes into the blades. The motor may bog down and sound strained; keep tamping steadily instead of pausing, since stopping lets the cubes re-freeze against the sides.
- Once the mixture stops clattering and starts to mound around the tamper, add the vanilla and blend another 10 to 15 seconds. The finished texture should look like soft serve, thick enough to hold a swirl when the tamper lifts out.
- Overblending past this point melts it back into something closer to a milkshake, and the only fix is refreezing the batch into cubes and starting over.
- Scoop straight from the blender for a soft-serve texture, or move it to a freezer-safe container for 40 minutes to 2 hours for something closer to scoopable ice cream.
- Press parchment onto the surface before sealing the lid to cut down on ice crystals.
I have tried different ways to make Vitamix Vanilla Ice Cream. Using frozen cubes is the best method. This works better than blending everything from a liquid base. For creamy results with less effort, the frozen cube method consistently performs best in my tests.